Meet the LEGO Art Mosaic Generator
LEGO Mosaics have been around for a while and there is the wonderful {bricksr} package by Ryan Timpe that makes it easy to construct them based on bitmap images. So, when I ran across the relatively new LEGO Art theme sets, I was instantly hooked. The current situation favors contemplative indoor activities and puzzling some mosaics over the Holidays sounded nice.
The only drawback was that the ‘The Beatles’ Art set is the one whose color palette I found most appealing but, having tremendous respect for the fab four and all, I am more of a Stones person. In any case, the long-term plan is to use the set to create custom mosaics of people/scenes that are dear to us, so it was the nerdy aspect of making this ‘hack’ happen that created the final pull.
There already is at least one very nice online tool, the LEGO Art Remix app by Dab Banerji that allows you to convert a given bitmap image file to a mosaic obeying the tile set restrictions of the LEGO Art sets. So, initially I thought that creating custom mosaics on Beatles tiles would be a walk in the park. Time to take Keith Richard’s twitter handle image for a spin.

Keith remixed on The Beatles set with the LEGO Art Remix App
As you can see from the right-most mosaic above, the art sets’ tile restrictions make it very hard to create a satisfying mosaic automatically. In the end, an automated ‘first shot’ along with some manual editing tools seemed like a useful alternative approach. Here we go.
The Task
What follows can act as a mini case study for the benefits of the open source community. I started looking into the available mosaic generators and found that very few deal with limited tiles. The ones that I found that do create mosaics that do not really look too good out-of-the box when images are less than perfect matches for the underlying tile sets. That means that manual modifications of the resulting mosaic are often required. Based on this, I thought that it would be cool to whip something up that
- provides a reasonably good automated conversion of images to the restricted tile sets of the LEGO Art sets,
- allows users to edit these mosaics interactively, keeping the tile restrictions in sight and
- ultimately prepares useful instructions to build the actual mosaic.
After my experiences with the automated conversion projects on the web I started with the interactive part. I am reasonably experienced in R and shiny so this was the platform of my choice. But, how does one build an interface for bitmap editing on shiny? My idea was to use the {leaflet} package to render the image. This is hacky as {leaflet} normally is used to render geographic data but, hey, this is supposed to be a quick toy project and I have worked with {leaflet} before, so: Why not? Time to produce a first screen shot.
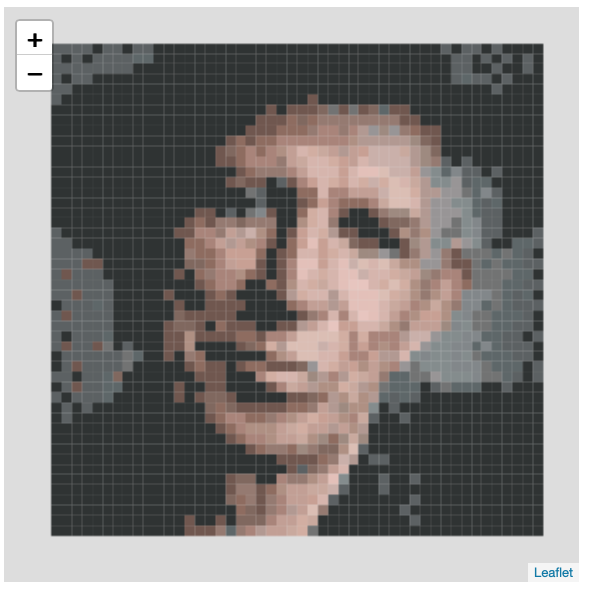
Keith as a choropleth map
How does one select pixels from the image for modification? Time to google. I quickly found this discussion on Stack Overflow that helped me to get the idea. I reference this here not only to give its participants the credit that they deserve but too highlight the maaaanny times that I benefited from the Stack Exchange universe. This often goes unnoticed but I believe that this platform has developed to one of the most important knowledge resources for software development and even regularly informs academic research.1
After selection has been taken care off, I wanted to implement flood-fill selection so that users can easily select areas that they want to convert. Flood-fill is one of these neat examples for the power of recursive algorithms and with the help of Wikipedia implementing it was almost to easy.
# This identifies areas with the same color within a 48*48 bitmap
# Writes to a matrix is_area in a higher environment so this
# needs to be defined prior to calling identify_area()
# as well as an img raster containing the actual data

identify_area <- function(area, x, y, color = NULL) {
    # https://en.wikipedia.org/wiki/Flood_fill
    if (is_area[x, y] > 0) return()
    if (is.null(color)) color <- img[x, y, ]
    if (any(img[x, y, ] != color)) return()
    is_area[x, y] <<- area
    if (x > 1) identify_area(area, x - 1, y, color)
    if (x < 48) identify_area(area, x + 1, y, color)
    if (y > 1) identify_area(area, x, y - 1, color)
    if (y < 48) identify_area(area, x, y + 1, color)
}

is_area <- array(0, dim = c(48, 48))

for(x in 1:48) {
  for(y in 1:48) {
    identify_area(max(is_area) + 1, x, y)
    if (min(is_area) > 0) break()
  }
  if (min(is_area) > 0) break()
}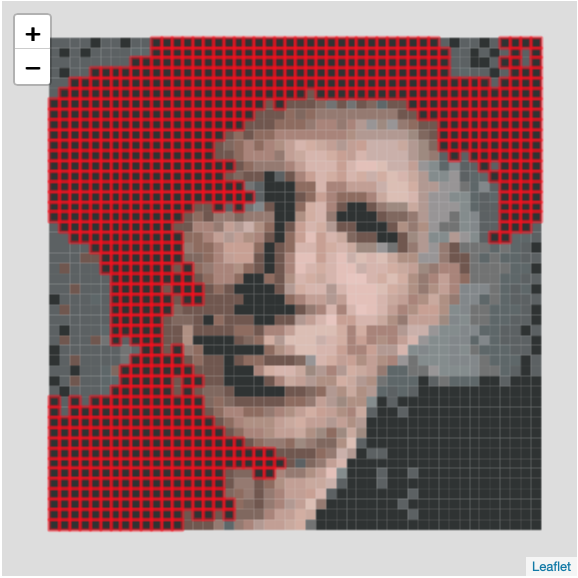
Keith, flood-filled
The next task was to identify the tile restrictions. Without help this would have been a clear road block to my toy project. I only have the Beatles set and counting all those tiles and identifying their precise colors would have ruined my Christmas break. But I was confident that the LEGO hacker community would provide everything that I need and, sure enough, I quickly found the site rebrickable.com that provides wonderfully clean relational data on all (!) available LEGO sets. Whow!
With this out of the way I completed the editing interface. There are two additional things about it that I like and that I would never been able to achieve without the help of “random strangers on the Internet”:
First, I use a colored Drop-down selector to pick colors to accommodate that the number of available colors change of the different LEGO art sets.
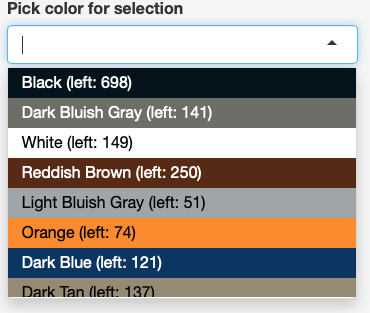
Colored drop-down to select colors
I am a CSS noob so this one would have been very hard for me without the help of this Stack Overflow discussion. Another feature of this, the changing text color depending on the background, is based on this Stack Overflow snippet
pick_text_color_for_bground <- function(color) {
  rgb_code <- col2rgb(color)
  luminance <- (0.299*rgb_code[1] + 0.587*rgb_code[2] + 0.114*rgb_code[3])/255
  ifelse(luminance > 0.5, "#000000", "#ffffff")
}
Second, after playing with the editing interface, I quickly noticed that a proper undo feature is really important for it to become usable. This looked like another road block, given my time budget for my toy project was only a few days and mostly the early hours where the rest of my family was sound asleep. I thought about ways to implement this efficiently in shiny and then I ran across this wonderful shiny module offered by Garrick Aden-Bule. Bamm!
With the second bullet point of my “specification list” knocked off, I moved on to focus on the automated conversion. Given my experiences with the web-based conversion tools available (I am entirely sure that I overlooked some) I was not optimistic. After implementing a first ‘greedy’ match, my results looked very similar. But here my day job as an applied economist came in handy. After thinking and reading about the problem a little bit, I found this discussion on (again) Stack Exchange. The pointer to the Hungarian Method helped me to understand that my problem can be described as a linear programming problem with each area/potential color pair being a variable that can take a binary value. Each variable has a cost attached to it. The cost is defined by the color distance (yet another topic where Wikipedia is very helpful) of the original color and the selected color multiplied with the size of the area. The objective function is to choose variables so that the overall cost of the color deviation is minimized. The restrictions are the tile set limitations and the requirement that each color area must be transformed to exactly one mosaic color.
The resulting linear programming model can become relatively large as the 48*48 images have a lot of areas at least when you have an input image with a large color depth (more than 2,000 in most cases). Taken together with the 15 colors provided by the ‘The Beatles’ set this means that you have 30,000+ variables with 2,000 + restrictions. I was concerned that the optimization of such a large model would take too long and require too much memory. I teach my students how to solve models of that class with 3 variables and 5 restrictions by hand (a fun activity, I know) and it takes quite a while ;-)
areas <- max(is_area)
colors <- nrow(mosaic_palette)

library(lpSolveAPI)

lpm <- make.lp(colors + areas, areas*colors)
set.type(lpm, 1:(areas*colors), "binary")
set.rhs(lpm, c(mosaic_palette$available, rep(1, areas)))
set.constr.type(lpm, c(rep("<=", colors), rep("=", areas)))
dists <- vector("integer", areas*colors)

for (i in 1:areas) {
  for (j in 1:colors) {
    set.column(lpm, (i-1)*colors + j, c(area_size[i], 1), c(j, colors + i))
    dists[(i-1)*colors + j] <- area_size[i]*color_distance(color_of_area(i), tiles[1:3, j])
  }
}
set.objfn(lpm, dists)
lp.control(lpm, timeout = timeout)

rv <- solve(lpm)
Fortunately, the ‘lp_solve’ library is implemented in good-old fast C. Its new R API also allows to use sparse matrices and this helps to circumvent memory problems. Thus, the core part of my image to mosaic conversion algorithm only covers 15 lines of code. If it converges, it takes not longer than 10 seconds on normal hardware. It does not converge always but most of the time. If it fails than the editing features of the shiny app help to circumvent the conversion problem. Time to meet Keith, converted to Beatles mosaic colors.
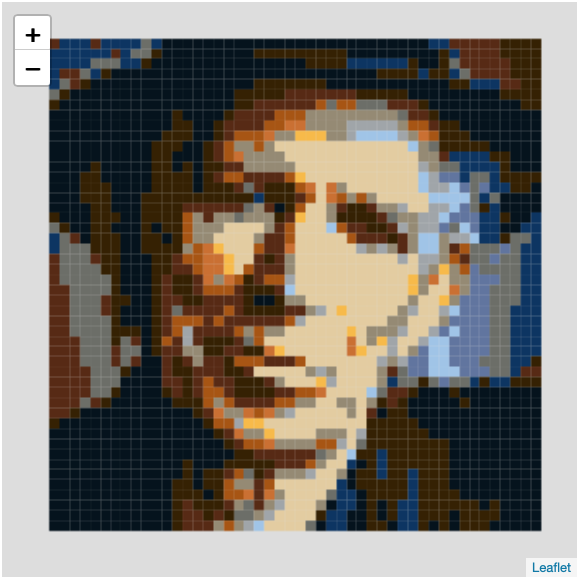
Keith as a Beatles mosaic
Now this looks better, right? I have to say that the conversion does not look that good for every image. For some images, there are simply not enough high-quality matches available. It is, however, a real improvement over the much faster greedy matching. And, given that it will take you hours to actually puzzle the mosaic, these additional 10 seconds seem like time well spent.
On to the last task, the preparation of a set of instructions. Given how perceptually close some colors are, they are really import even though you can download the transformed bitmap image. I used the original instructions from the set as inspiration and was once again amazed by the flexibility of the {ggplot2} package (sorry, base graphics). The resulting PDF for the Keith Beatles mosaic can be be found here. Based on the assessment by my fellow family members, they get the job done well.
Putting the pieces together
Everything taken together, you get the LEGO Art Mosaic Generator. It is still a little bit rough around the edges but it works (as far as I can tell). Needless to say, its code is available on Github.
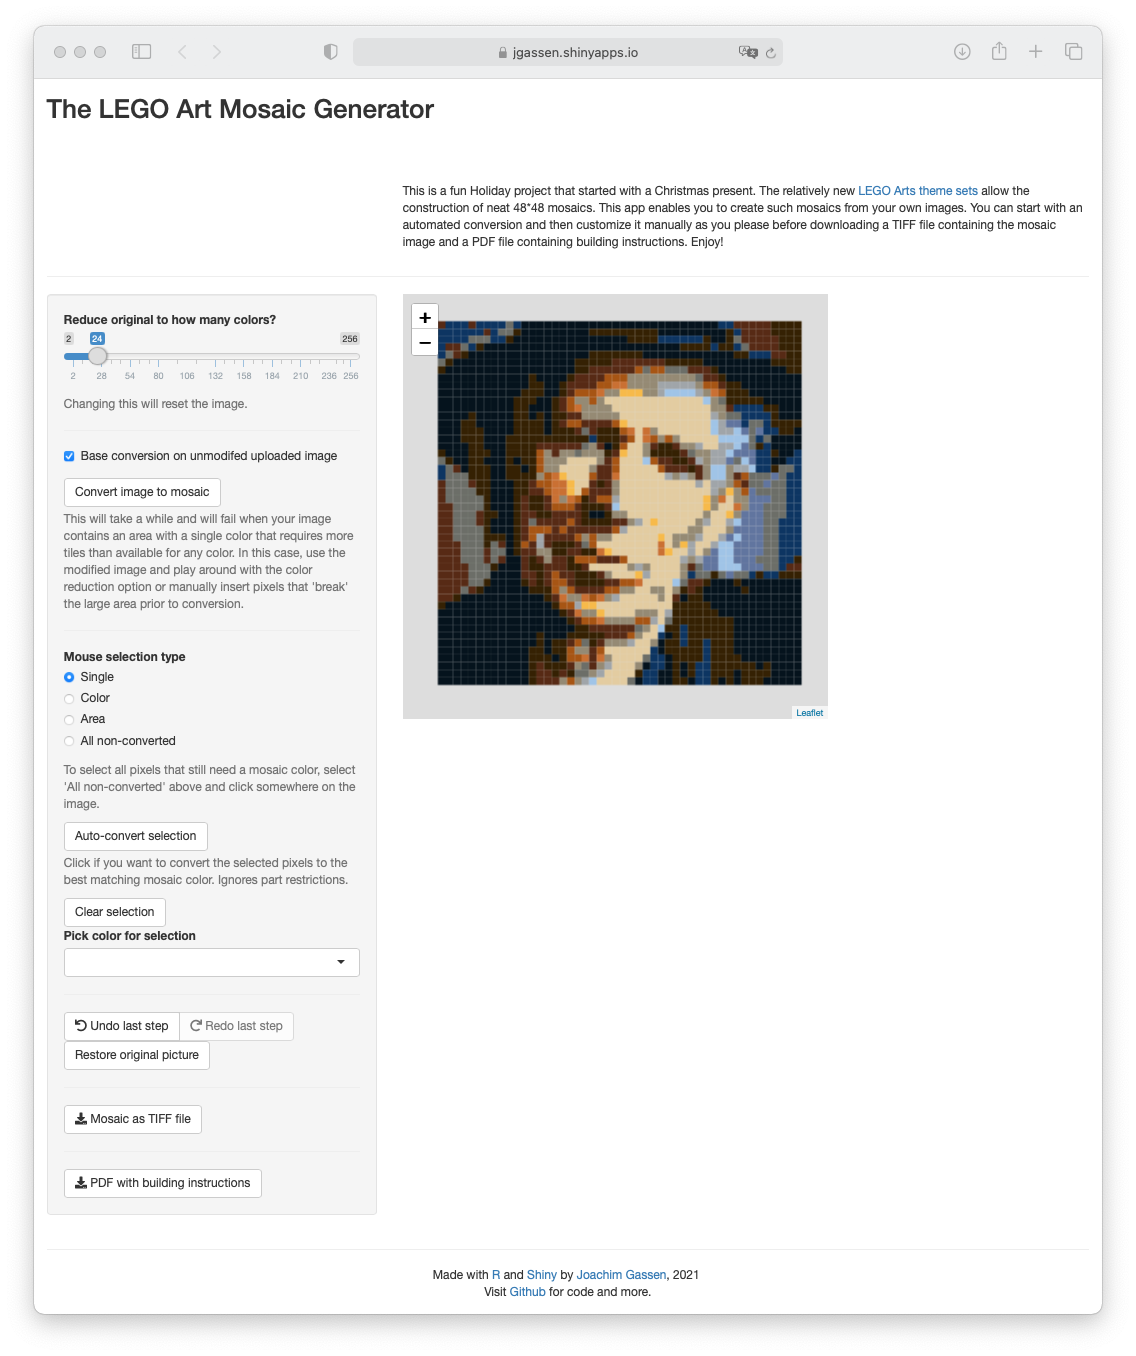
Sreenshot LEGO Art Mosaic Generator
Time for the real world. This is what puzzling Keith based on a Beatles tile set looks like.
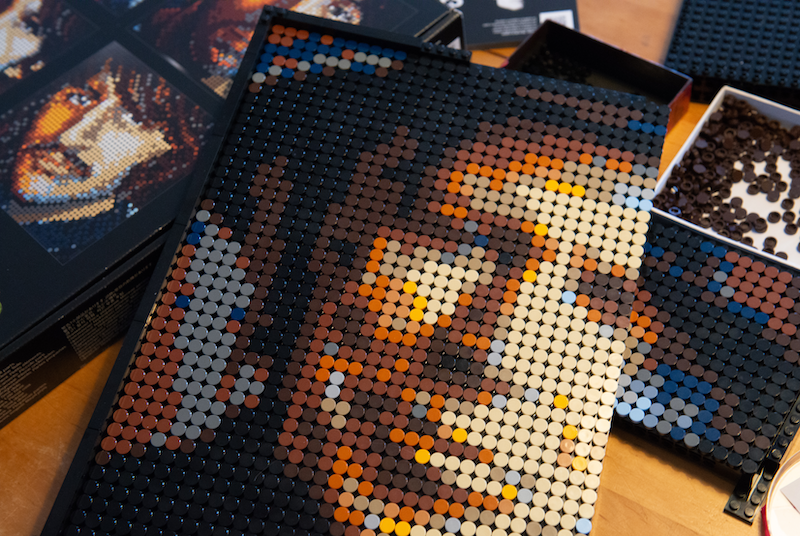
Keith in the making
And here you see the final outcome. Stones 1: Beatles 0.
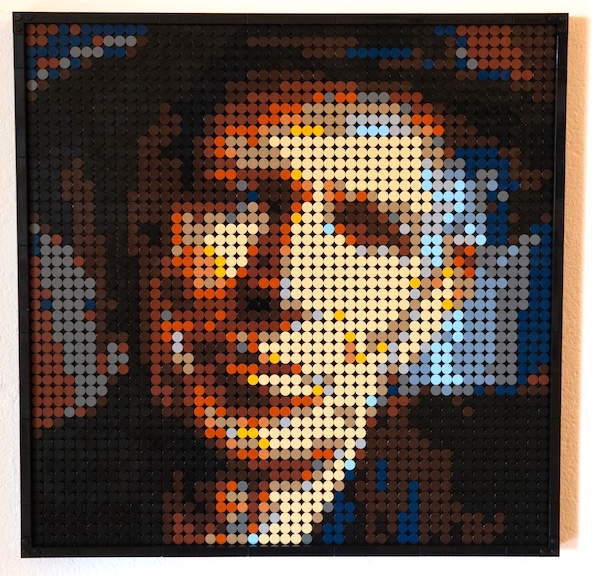
The final real-life mosaic
Summary
I have to say that this was a fun toy project. Like always, it took me a little bit longer than I initially thought. But then again, it became bigger that I initially planned it to be. I have been around for a while and I remember software development before the Internet was a real thing and I never cease to be amazed by the productivity boost that open collaboration brings.2 Developing something like this from scratch would be a year-long project while with the help of the open-source community it can be achieved as a part-time job over a week. So, thank you very much to all of the members of this wonderful community and a happy new year everybody!
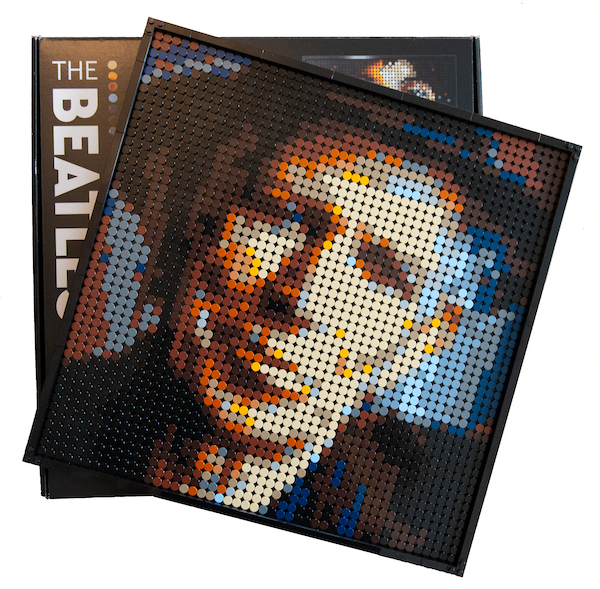
Stones: 1 - Beatles: 0
BTW: I wonder whether it would be good to start citing Stack Exchange references is academic studies but maybe we should have a more up-to-date system to record impact in our multiple resource channel world. Any ideas?↩
For the economists: I wonder how and to what extent this is reflected in economic welfare measures like GDP. See Lerner and Tirole (2005) and in particular Coyle 2018 for an interesting discussion.↩
